Showing posts with label holidays. Show all posts

Wednesday, December 7, 2016

DIY Christmas Room Decor! Easy Decorations For The Holidays! 2016

DIY Christmas Room Decor! Easy Decorations For The Holidays! 2016

Hello everyone! How is it going? Outside the showcases stores  and in every corner of the city is already feel the air of festivity, in fact just a few weeks at Christmas. Then it's time to decorate the room but do not want the usual colorful decorations that are not well for your room or are not your style. However the unique pieces of decoration you like the most cost a lot so I decided to do this tutorial with material that we have in our  house. This make festive and cozy room but still a minimal look. 

What is needed for this tutorial are: 
              1.sheets of A4 paper, 
              2.school glue, 
              3.white thread, 
              4.pencil, 
              5.cardboard, 
              6.scissors, 
              7.thin brush. 

What we're going to make is a garland to hang on your wall or you can use the ornaments to decorate the Christmas tree. We will make three elements: 2 ornaments and a string of stars, this DIY is very easy to accomplish in a couple of hours the garland is ready to hang it on the wall. But given that the Christmas spirit is to share and be with the one you love you can benefit  this opportunity to be in the company of your friends, boyfriend / girlfriend, or your family members so the time of realization of the garland is obviously halve. First we have to create  the ornament pattern that we want, I did freehand all the elements of the garland but you can download shapes ornaments that you like from the internet images.
 For the realization of an ornament serves a sheet of paper cut into four pieces and then fold together in half then trace above with pencil following the pattern. After cutting out put together three pieces folded  , applied the glue, put the white thread  as I show in the tutorial and then glued the fourth part and here the first ornament is made. same procedure is done for the second ornament that in apparence looks the same but in reality, is more rounded and squashed. For the stars after  cut out following the pattern , fold in half and then I do the same as I did for ornaments I take three pieces  folded  glue together not forgetting to use a long string enough to contain 3 stars. once finished there is nothing left to do but to assemble the garland leaving a space between an ornament and the other of 5-6 cm. if you want to keep them fixed in place then applied some glue.


I hope you have fun and enjoy the company of your loved ones because what you have create  is a magical atmosphere. If you liked this project diy put thumbs up to let me know that you want other christmas diy. If you want some more clarification about the diy feel free to write below the video I'll reply as soon as possible.
Share this video in your social networks if you can, so it can reach more people, that they may serve as room decor inspiration.
If you are new and have not yet subscribe  to my channel push the button  below and begins to be part of our community. Have a nice day everyone . See you soon Bye Bye ^^


Tuesday, April 19, 2016

WHAT SWIMWEAR MUST BE WORN FOR SUMMER? TRENDS- 2016

WHAT SWIMWEAR MUST BE  WORN FOR SUMMER? TRENDS- 2016

Spring is now in full swing, and although there are still a bit 'of months to much deserved summer vacation, there are others who think of a nice beach holiday; what swimwear must be worn for fashion spring summer 2016?


The summer styles 2016


Jungle Fever, characterized by a euphoric blend inspired by the settings of the Black Continent. The contrasting patterns and colors acids are two of the most important features of this style.


Rave Couture, a celebration of pop art sophisticated and elegant; optical illusions and the reasons black and bank (accompanied by soft metallic colors) are the protagonists


Memphis Sports: humor, color and imagination are the key aspects of this style, which gives ample space to the technical fabrics and racing models with playful prints with combinations of geometric shapes and designs.


Brutal Glam, the style for the energetic and aggressive women with an eye to the future and the intergalactic environments: black and silver are the backdrop for cold and cosmic colors.


Now let's see what will be the trend of bath costumes models for fashion spring summer 2016. On the beaches dominate the bras band (just look at the collections of Marysia and Miss Bikini Luxe), but will also present the trikini. Every year we hear that there will be a strong piece swimsuit recovery, but this year the bikini primacy will not be questioned. The trikini is preferred in other situations (thermal baths and spa, for example), but on the beaches you will not see very often. So let's focus on what will be the models of two-pieces in vogue in the summer.


                   Marisya Collection 


Miss Bikini Luxe 2016


                          Trikini 2016


We will be particularly appreciated the swimsuits in sports style, those characterized by a bra in perfect style with Olympic indoor neckline and single string in the middle of the back. H & M, Mara Hoffman and Mikoh are just some of the brands that link strong on this type of costume. 


 Sporty style H&M 


                                                                                   Triangle Calzedonia 2016

Bikini Parah

They will win a good visibility even bikinis with ruffles and those with molded cups. For those who do not particularly like the symmetry there is always the possibility to opt for the shoulder tops (Fendi and Parah have nominated them in their collections). The classic triangle bikini still continue to be successful, because the chance to tie it in different ways makes it particularly versatile and suitable for achieving a tan practically perfect: point strong of these Calzedonia models, Yamamay, Victoria's Secret and many other important names.


 Fendi Shoulder Bikini Top     Victoria's Secret 2016 

Thursday, December 31, 2015

SOPHISTICATED NAILS - HAPPY NEW YEAR


SOPHISTICATED NAILS  - HAPPY NEW YEAR


Hello and welcome back to my youtube channel. Today I will introduce a Nail Art for the New Year which will propose a tutorial, like the others on the Nail Art Christmas. For this new year, I thought a sophisticated design that can be achieved with patience by all. I painted with dark blue enamel ring finger, obviously I had previously used a base sealer to protect the nail. the index finger the painting with a glaze with silver glitter, however other nails with white enamel. on the ring finger and the white one I designed the wavy lines that fit each other .not have to be precise with your lines so because the messages will be filled spaces.  Then I applied over the lines of dots. in the remaining spaces I applied the glaze in silver glitter, this one looks glittering and very sophisticated to nail art. in other nails I applied swarovski blue (trick to make them the same color just apply over swarovski the same dark blue color which can be either an enamel or acrylic painting). only it remains to put the top coat and the result is fantastic  WOW.. Happy New Years my friends!! ^^


Tuesday, December 29, 2015

ETHNIC NAIL ART TUTORIAL- WELOVEIT INSPIRED


Hellooo nail art lovers! Here’s a fairly simple ethnic  print nail art tutorial. For this nail art I was inspired by weloveit  so In this nail art tutorial I show you how to create two ethnic prints .
 I Hope that you like this cool nail art.
material used :base coat 
               orange polish 
               white polish
               black polish
               top coat
               dotter
               thin brush

I drew the ethnic prints on the ring finger and middle finger,  I painted with orange polish
  the other fingers .   
                        
if you realize this nail art don't hesitate to tag me #vcaci on instagram ^.-. 
i hope you enjoy the video ^^ make sure to subscribe and to give thumbs up if you liked it . bye bye :*.


Tuesday, December 22, 2015

CUTE PENGUINS CHRISTMAS NAIL ART #2


Hello beauties !! As promised here's another Christmas nail
art tutorial. Can you believe its only 3 days until Christmas? Are you feeling
excited?! I sure am! Today My inspiration came from a cute Pin on Pinterest.
When I saw it I just knew I wanted to try and recreate it! For this manicure I
began with base coat, two coats of light blue polish , with black nail polish
with glitter i did an outer oval shap. I filled the inner oval space with white
polish and i drew the eyes , with orange polish i did themouth and the feets. to
make it more festive I drew sparkly papillon for the mans and for the women brillant
necklace I sealed all gel effect top coat. I'm ok about how this turned out...
it is so cute.


Are you chilled for Christmas or are you hectically trying
to get everything ready?  Happy holidays
to all!!


Friday, December 18, 2015

FESTIVE CHRISTMAS NAIL ART #1


FESTIVE CHRISTMAS NAIL ART #1

Hello my dear nail art lovers!!  Ho ho  christmas is near the corner ..^^   besides thinking of the outfit we must also decide which nail art do for our nails. This is the first proposal in the days to follow I propose other ideas. We know that the colors par excellence of Christmas are red and white. no more talk lets start the  nail art.I apply the base coat in all fingers, then on the ring finger with red nail polish create a sort V shape. to the side of the V shape do white wavy line with with the help of a thin brush. with the dotter I do white dots, above them I add the red dots. On the middle finger with white shimmer I create the same V-shape, then with red gIaze do the curved lines at the sides dots. with white glazeI do small little dots at the center and also I add over the red dots. I paint the other nails as desired with the shimmer white and with red nail polish .I end all with the top coat. and here we have a beautiful nail art. I am very pleased with the outcome. Stay tuned for the forthcoming proposals for christmas nail arts.


Tuesday, December 15, 2015

DIY TUMBLR SHORTS PROJECT


DIY TUMBLR SHORTS PROJECT

Hey guys in this video I show you another DIY-project .. I really like the trend of shorts distressed jeans . Whether you pair your shorts with a comfy blazer or with or a sophisticated blouse the main thing is that you look chic. So decided to turn this old long jeans into trendy hot pants.Tools that are necessery for this tutorial are the scissors , tweezers also use some jewels stones, a meter, a pencil ,needle and thread. 

Thank you for watching! If you guys enjoy this nail art do not forget to make this video THUMBS UP, COMMENT and SUBSCRIBE.


Friday, November 27, 2015

DIY- iphone case


Hello guys, this is my first DIY video where I show you how to customize this transparent cover, it was really easy to do and the result seems very satisfactory. To do this, just take many materials:

a transparent cover for iphone, a nail polish, a dotter or toothpicks, a fine brush and a top coat that makes it shiny and protects the design. I hope you like my video and if you like to try to realize this DIY  be creative !!

If you want to see more DIY videos like this do not forget to like and leave a comment on what DIY you want me to realize !

Ciao ragazze e ragazzi, questo è il mio primo video fai da te dove mostro come personalizzare questa cover trasparente , è stato davvero facile da fare e il risultato sembra molto soddisfacente . Per fare questo non sono necessari molti materiali basta solo:

un cover per iphone trasparente , uno smalto, un dotter o stuzzicadenti, un pennello sottile e un top coat che rende lucido e protegge il disegno. Spero che vi piaccia  il mio video e se vi piace cimentatevi anche voi a realizzare questo DIY - siate creativi !!

se volete vedere più video fai da te come questo non dimenticate di mettere mi piace  e lasciate un commento su quale diy volete che io realizzi !


BUSINESS / MARKETING MAIL:vcaci4@gmail.com


Thursday, October 15, 2015

DIY IPHONE CASE AC MILAN

<iframe width="560" height="315" src="https://www.youtube.com/embed/WyVB2K2AC14?autoplay=1frameborder="0" allowfullscreen></iframe>


hello DIY-lovers! last week I went to see a football game. and being a supporter of milan then I decided to make diy iphone case with the logo of milan. This is also an idea for a gift. once painted with the white acrylic transparent cover so the red acrylic enhances more. I continue to give two coats of acrylic with red and black acrylic do the logo of milan. when I make a mess just delete with a cotton cloth moistened with water with white fill the spaces. after the logo, I make the details of the team so cheering. I end up using all with mod podge as a fixative.

Credit this piece (CC: By License)

Copy and paste the Following text into your video's credits:

"Severe Tire Damage" Kevin MacLeod (incompetech.com)

Licensed under Creative Commons: By Attribution 3.0

https://creativecommons.org/licenses/by/3.0/

Thank you for watching! If you guys enjoy this nail art do not forget to make this video THUMBS UP, COMMENT and SUBSCRIBE.


Wednesday, July 15, 2015

Special Occasion Nail Art Design


Hi nail art lovers! In today tutorial  i show you how to do two easy  nail art perfect  for
any special occasions, especially for Christmas. The material that i used is:
-crystal rhinestones  à www.bornprettystore.com
-glitter powder sheets àwww.bornprettystore.com
-double ended dotting brush à
www.bornprettystore.com
-rose rhinestone from mixed decoration kit à www.bornprettystore.com

I ordered these supply online at www.bornprettystore.com and I have a positive view regarding this site because the materials have arrived on time,well packaged and comply with the images of the site. And  then I recommend it as a site because it has a good quality-price. For  those who want to order on this site there is a discount code à BornPrettyStore 10% off code: CACW10.This site has a variety of items at a low price and then recommend it.^^ I will leave all the information of the items in the description box
Nail polish that i used :
- light purple pastel nail polish
-glitter purple nail polish
-white polish
-red orange polish
-black polish
-base and top coat
For special occasion i create two nail art design , one of
them  elegant and the other is more modern. So lets start.
Nail art #1 
once the base coat is laid applies the glaze light purple then on the ring finger  take a rose rhinstone by decorating kit and with a nail glue or with a top coat nail stick the rhinestone. then with the glitter dark purple polish make small petals around the rhinestone  which continues on one side of the nail. On the index finger applies two small crystal rhinestone and draw petals around them go to the two sides on top of the nail. Apply the top coat and you will have an amazing elegant nail art.
Nail art #2 
apply the base coat then  laid the red orange polish on all the nails except on the ring finger , here apply a white polish .
when  it is not dried completely, stick on the glitter powder sheets  and creates a sort of flower with different colors and on the sides put small dots with black polish. Finally apply the top coat and the result is so fashionable.
Thank you for watching don’ t forget to like, share, comment. if you have any suggestion about the nail art that you want to see realise by me comment below .
For more future videos subscribe so you can stay tunned. See
you soon. Bye bye ^^

Tuesday, July 7, 2015

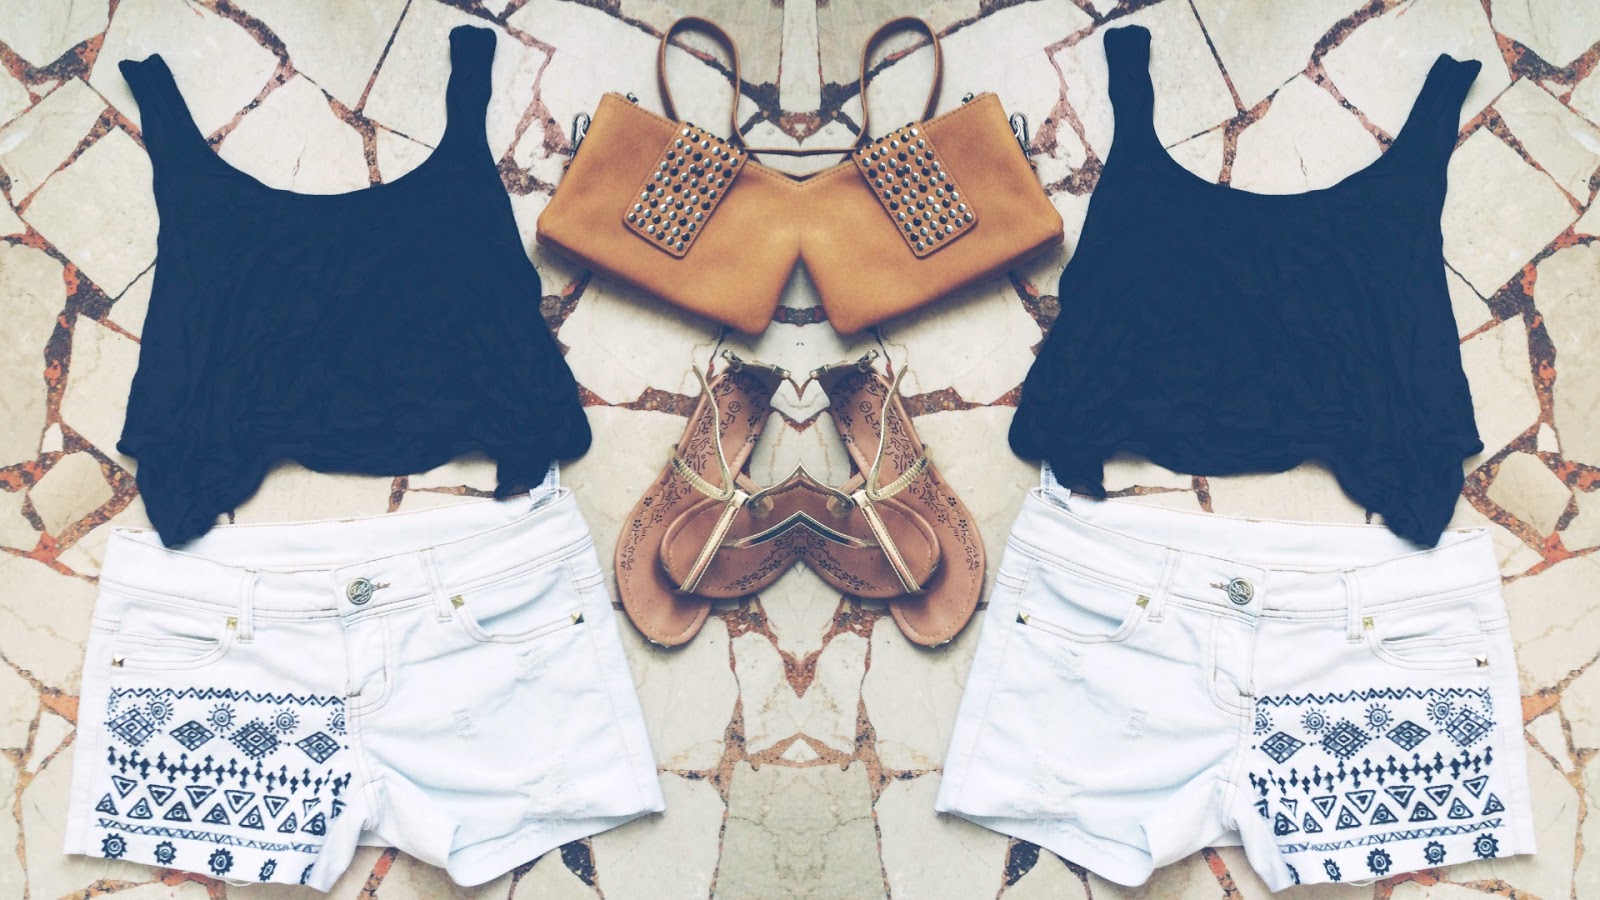
DIY CLOTHES - AZTEC DENIM SHORTS + OOTD


DIY CLOTHES - AZTEC DENIM SHORTS

Hi guys! It's DIY time so in this tutorial I show how to customize a trivial shorts into a fashionable shorts perfect for summer season.
 Thank you for watching! If you guys enjoy this nail art do not forget to make this video THUMBS UP, COMMENT and SUBSCRIBE.
 Let me know if someone of you recreate this nail art with #vcaci on instagram  I will post them on my instagram and twitter so follow me .
See you soon.. Bye Bye..^^

Tuesday, May 26, 2015

AZTEC SPRING NAILS - NAIL ART TUTORIAL


AZTEC SPRING NAILS - NAIL ART TUTORIAL

Hellooo everyone! Here I'm with a new Nail Art this time an AZTEC style. In this nail art tutorial I show you how to create this four designs . You can try this nail art it's very simple - Remember the secret for beautiful nails is to open our minds and let the creativity take over..
 The material that I used: - kiko peach color 
                           - kiko gold polish
                           - wet n wild white color
                           - deborah black color
                           - wet n wild base coat
                           - kiko top coat

Subscribe and receive updates by email

Enter your email address:

Delivered by FeedBurner